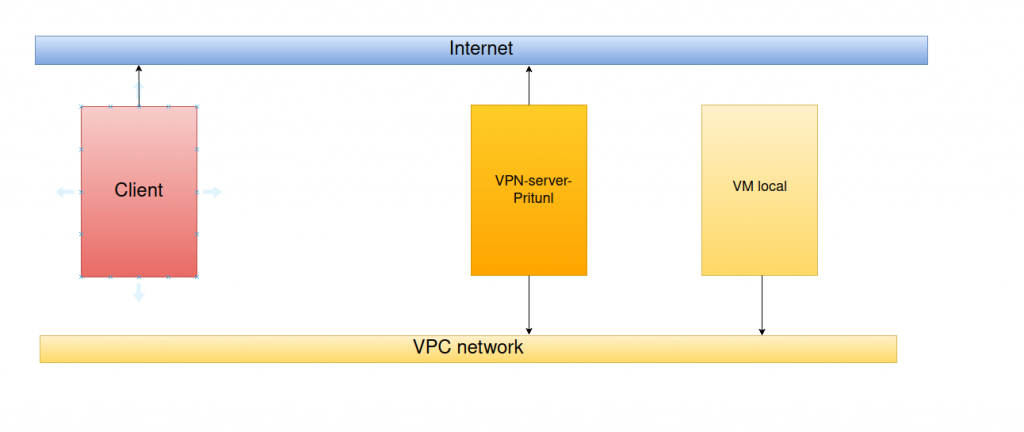
Mục tiêu: Từ client có thể conenct tới mạng VPC network thông qua VPN-server-Pritunl.
Phân hoạch địa chỉ IP
- VPN server:
- IP public: 103.56.156.114
- IP VPC: 10.20.1.47
- VM local
- IP VPC: 10.20.1.91
Yêu cầu: Client có thể connect tới VM local dải 10.20.1.91.
Các bước cài đặt trên VPN-server
apt-get update
apt-get -y upgrade
echo "deb http://repo.pritunl.com/stable/apt focal main" | sudo tee /etc/apt/sources.list.d/pritunl.list
echo "deb [ arch=amd64,arm64 ] https://repo.mongodb.org/apt/ubuntu focal/mongodb-org/4.4 multiverse" | sudo tee /etc/apt/sources.list.d/mongodb-org-4.4.list
curl -fsSL https://www.mongodb.org/static/pgp/server-4.4.asc | sudo apt-key add -
apt-key adv --keyserver hkp://keyserver.ubuntu.com --recv E162F504A20CDF15827F718D4B7C549A058F8B6B
apt-key adv --keyserver hkp://keyserver.ubuntu.com --recv 7568D9BB55FF9E5287D586017AE645C0CF8E292A
apt-get --assume-yes install pritunl mongodb-server
systemctl start pritunl mongodb
systemctl enable pritunl mongodb
Khi truy cập vào IP public thế này nghĩa là truy cập thành công
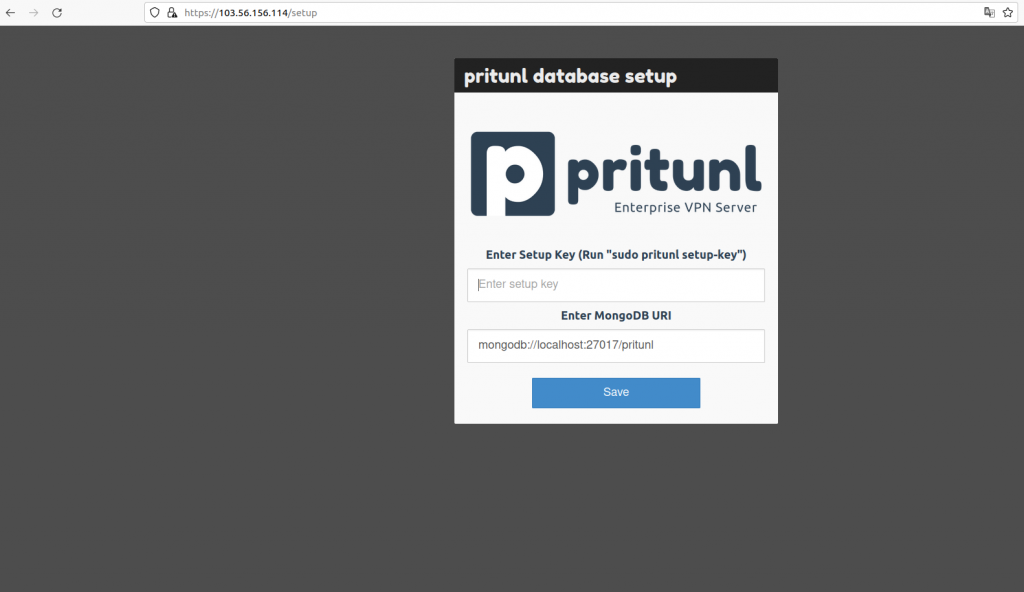
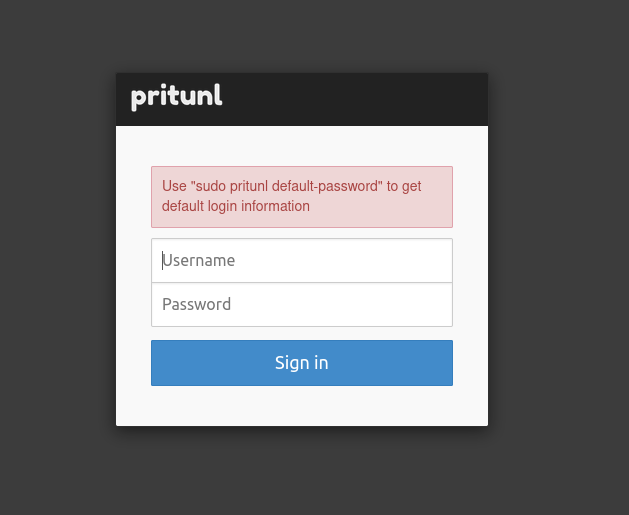
Sau đó dùng lệnh pritunl setup-key để lấy password default

Thực hiện thay đổi password trong giao diện
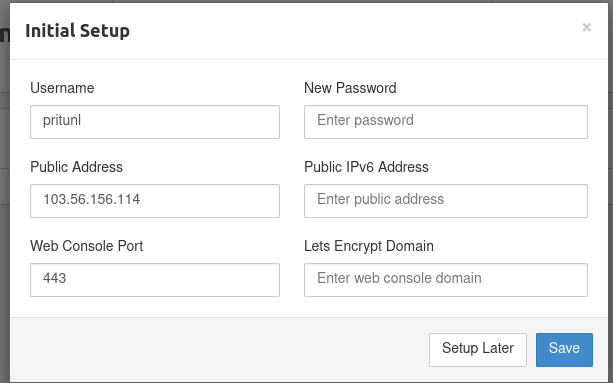
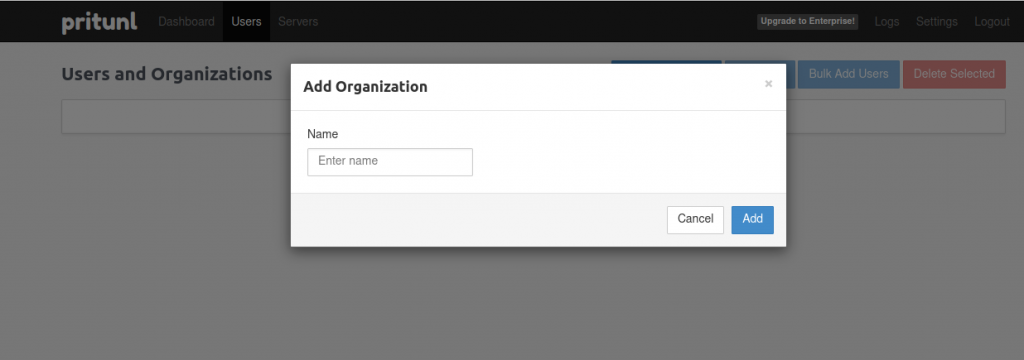
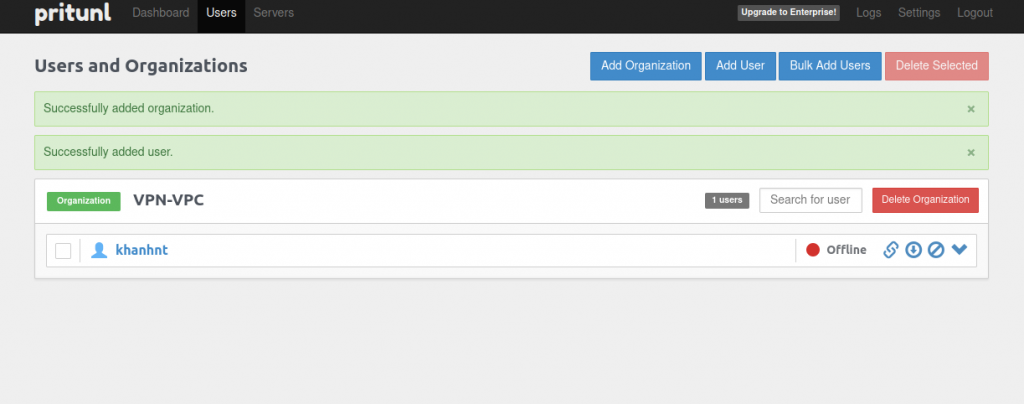
- Sau đó add organization và add user
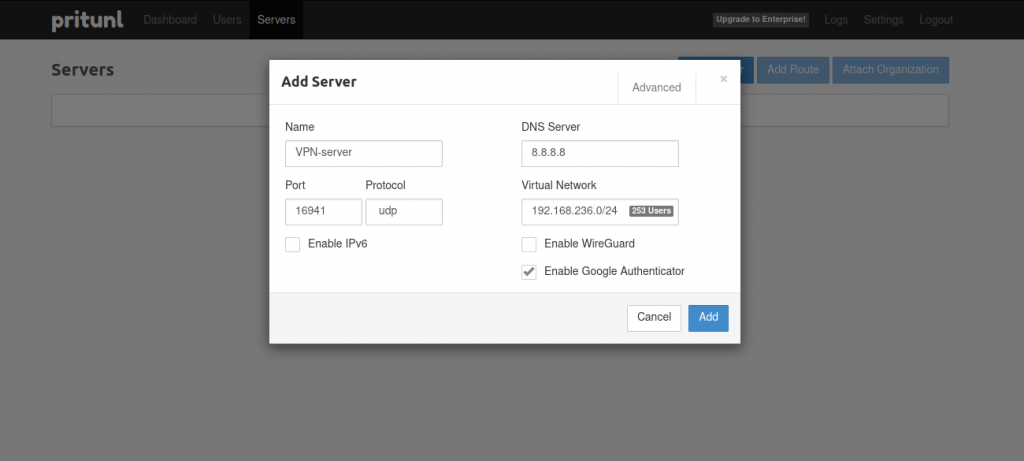
Sau đó add server: Virtual network là dải IP tunnel
Sau đó attach Organization vào Server
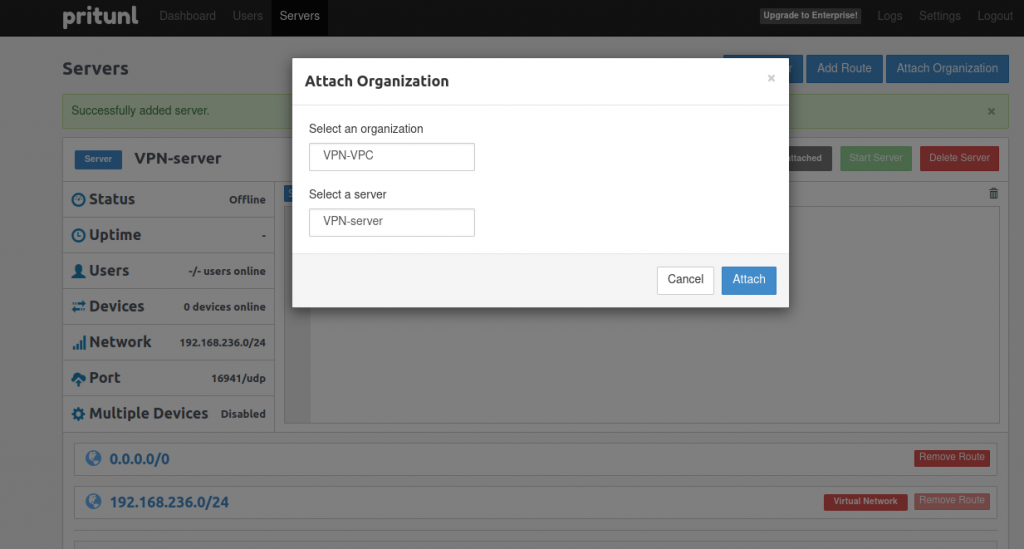
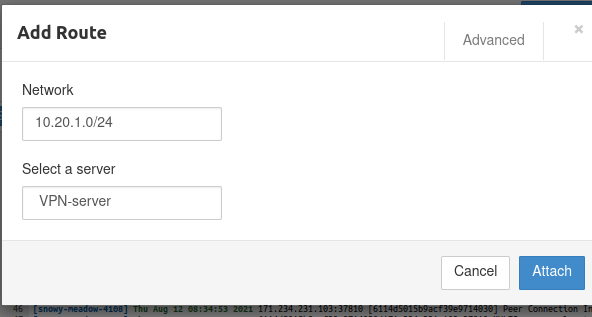
Add route đến dải 10.20.1.0/24 (dải mạng VPC)
Sau đó chọn start server.
Thực hiện cấp file cho client

- Trong phần user chọn Get Two-Step Authentication Key để lấy Google Authentication Key.
- Trong phần user chọn Get Temporary Profile Link để lấy file config ovpn.
Thực hiện cài đặt Pritunl client
- Truy cập https://client.pritunl.com/#install để cài đặt.
- Sau khi cài đặt xong chạy lệnh pritunl-client-electron.
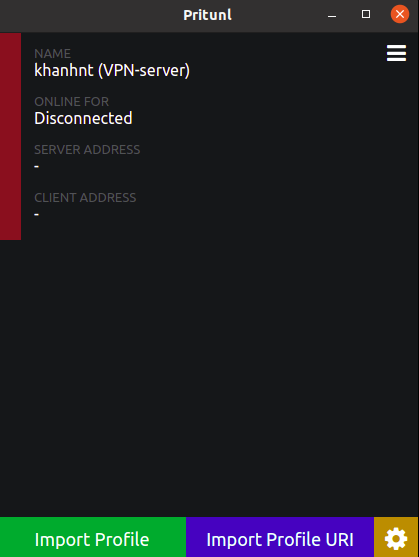
- Sau đó Import Profile file ovpn đã được tải về.
- Sau đó chọn connect: Phần enter pin thì nhập pin đã tạo khi tạo user, OTP thì sử dụng Google Authenticator.
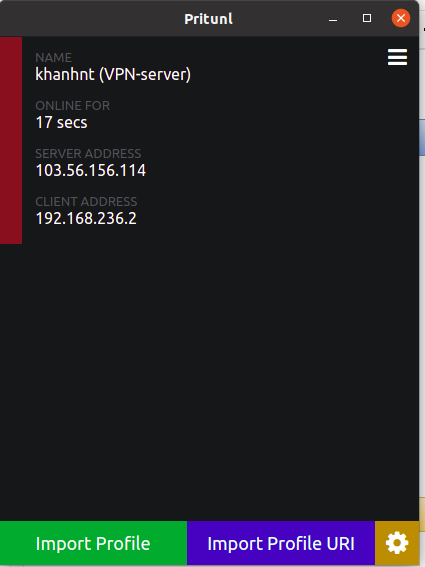

Nhìn ip r đã thấy routing đến dải 10.20.1.0/24 thông qua 192.168.236.1 (chính là dải IP tunnel)


Docs: